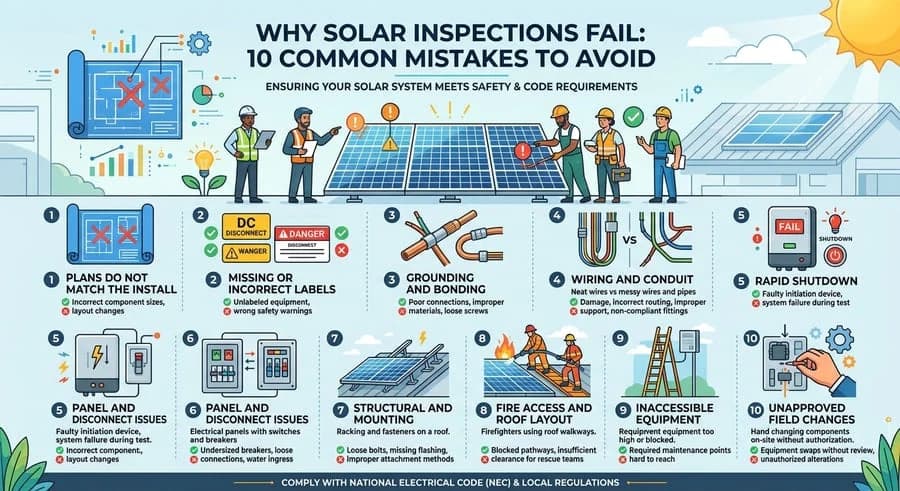
Solar inspections most often fail because the installed system does not match the approved plans or because labels, grounding and bonding, wiring, rapid shutdown, mounting, or equipment access do not meet the requirements the AHJ enforces. Most failures are specific correction items, not a rejection of the whole system, and most can be prevented before the inspector arrives.
A solar inspection correction does not mean the entire project has been rejected. In many cases the inspector cites one or more specific items that must be fixed before the project can receive final approval. Typical items include differences between the installed system and the approved plans, missing or incorrect labels, grounding and bonding issues, wiring problems, rapid shutdown concerns, structural or mounting discrepancies, and equipment the inspector cannot reach.
Exact requirements vary by jurisdiction, adopted code edition, project type, equipment, and the Authority Having Jurisdiction (AHJ). That variation adds up: research from the National Laboratory of the Rockies (formerly NREL) notes that review and approval across thousands of jurisdictions and utilities can sometimes add weeks or months to an installation. Even so, most corrections fall into the same general categories.
This guide explains 10 common reasons solar inspections fail or receive correction notices and what installers and property owners should understand before requesting the inspection. If your installation is already complete and you want the full process, see our guide to Solar Inspection After Installation: What Happens Next?.
Why Solar Inspections Fail: Quick Reference
| Common Correction | What the Inspector Compares | Typical Fix |
|---|---|---|
| 1. Plans do not match the install. | Field installation against approved permit documents | Revised plans or AHJ approval for the change |
| 2. Missing or incorrect labels | Placards and markings against the final configuration | Replace or add labels that match the final design |
| 3. Grounding and bonding | Connections and hardware against plans and manufacturer instructions | Correct the connection or hardware. |
| 4. Wiring and conduit | Conductors, protection, and conduit against the electrical plans | Rework wiring or document the change. |
| 5. Rapid shutdown | Installed equipment and configuration against the approved design | Correct equipment, wiring, or markings |
| 6. Panel and disconnect issues | Service equipment, breakers, and disconnects against the design | Correct the installation or update the plans. |
| 7. Structural and mounting | Racking, attachments, and foundations against structural details | Structural corrections or engineer review |
| 8. Fire access and roof layout | Array layout and pathways against approved plans | Restore the approved layout or revise the plans. |
| 9. Inaccessible equipment | Whether the inspector can safely reach each component | Clear access before the inspection |
| 10. Unapproved field changes | Final installation against the permitted design | Document the change and get AHJ approval. |
Why Do Solar Inspections Fail?
A solar inspection is intended to verify that the completed installation complies with the applicable requirements and corresponds with the approved project documents. Problems generally fall into three categories:
- Installation issues: Something was installed incorrectly or incompletely.
- Plan discrepancies: The completed installation differs from what was approved.
- Inspection-readiness issues: The installation may be substantially complete, but the inspector cannot properly verify required components, equipment, labeling, access, or documentation.
Because the same categories repeat, public checklists exist to catch them. The IREC Model Inspection Checklist for Rooftop PV is one widely used example. IREC notes that a municipality can use it to generate a correction notice listing commonly occurring installation errors. Its published update reflects the 2017 NEC, so confirm the code edition your AHJ enforces today.
An inspection correction does not necessarily mean the entire solar system has failed. Depending on the issue, the fix may be as simple as replacing a missing label, or it may require electrical work, structural changes, revised plans, or additional AHJ review. The following 10 areas create the most inspection problems.
1. The Installation Does Not Match the Approved Plans
One of the most important reasons a solar project receives inspection corrections is a difference between the approved plans and the completed installation. The inspector may compare the equipment and configuration in the field against the permit documents. Changes that commonly create problems include:
- A different number of solar modules was installed, or the array layout changed.
- A different module model, inverter, or racking system was used.
- A battery was added, removed, or relocated.
- Inverter or battery locations changed.
- The electrical configuration changed.
- Structural attachment locations changed.
Why this matters. The approved plans are part of the project’s permit record. If the finished system differs from them, the AHJ may need to decide whether the change is acceptable or whether revised plans or additional approval are required. This is especially true when the change affects electrical calculations, equipment ratings, structural calculations, fire access, equipment clearances, disconnect locations, battery configuration, or interconnection details. A field change does not automatically make the installation unsafe. The issue is that the AHJ approved one design while the inspector is looking at another.
In jurisdictions that use SolarAPP+, which provides an inspection checklist and final sign-off after installation, a design change may need to be approved in the platform before the inspection is scheduled. Fremont, California’s instructions for amending an issued instant solar permit state that when additional unpermitted work is found, the inspector will stop work on the permit and direct the contractor to apply for the correct permits.
How to avoid it. Before the inspection is requested, the responsible party should compare the completed installation against the approved plans. If something changed during construction, determine whether the change must be documented or approved first. Do not assume a replacement is acceptable because the equipment looks similar. Our article on solar installation revisions and their causes explains why field changes and change orders drain time and money.
Solar Permit Solutions
Skip the Permit Headaches
We design plan sets that pass inspection the first time. Code-compliant, PE-stamped, accepted by AHJs nationwide.
2. Missing or Incorrect Solar Labels
Labels and placards are another common source of inspection corrections. Solar installations involve multiple pieces of equipment and electrical circuits that must be identified for safe operation, maintenance, emergency response, and future service work. Depending on the project and applicable requirements, inspectors may review labels associated with PV equipment, disconnects, electrical service equipment, rapid shutdown, battery storage, inverters, and other electrical equipment, along with system identification and warning information.
Why do labeling problems happen? Labels may be missing, incorrect, illegible, installed in the wrong location, or inconsistent with the final system configuration. A label can also become a problem when equipment or the electrical configuration changes during installation but the labeling is not updated.
How to avoid it. Use the final approved design and the applicable requirements to decide which labels are needed. Do not rely on a generic label package without checking that it matches the actual project. Requirements also change between code cycles. For example, the 2023 NEC moved rapid shutdown marking requirements into 690.12(D). Our solar PV labeling requirements guide breaks down the wording, format, and edition differences.
3. Grounding and Bonding Problems
Grounding and bonding are important parts of a solar electrical installation and are frequently reviewed during inspection. Problems can occur when connections are incomplete, incorrect, improperly installed, or inconsistent with the approved electrical design. Potential correction items involve equipment grounding, racking and module bonding, grounding conductors, grounding electrode connections, bonding jumpers and hardware, electrical enclosures, and connections between equipment.
Why grounding and bonding problems happen. Some problems are simple installation errors. Others occur because the installer used hardware or a configuration that differs from the design or the manufacturer requirements. A connection may look complete and still require correction if the wrong component was used or the connection was not properly made.
How to avoid it. Review grounding and bonding against the approved electrical plans, the applicable electrical requirements, the manufacturer installation instructions, and the requirements of the specific equipment and racking system. Listed or labeled equipment must be installed in accordance with its listing or labeling instructions, a principle OSHA’s general industry electrical standard also states in 29 CFR 1910.303(b)(2). For practical help passing this part of the inspection, see our guide to solar grounding and bonding inspections.
4. Wiring, Conductor, or Conduit Problems
A system can look complete from a distance and still have problems in the actual electrical installation. Inspectors may identify incorrect conductor sizing or type, improper routing, inadequate conductor protection, improper terminations, damaged wiring, incorrect conduit sizing, improper or inadequately supported conduit, and wiring that differs from the approved electrical design.
Why wiring problems cause corrections. Solar electrical systems have specific requirements for conductors, circuit protection, wiring methods, and equipment connections. The applicable requirements depend on the system design, equipment, installation method, and adopted code edition. The National Electrical Code (NFPA 70) is the baseline, and AHJs enforce the edition they have adopted. A solar system that powers on can still require electrical corrections before the AHJ approves it.
How to avoid it. Compare the installation with the approved electrical plans and the manufacturer’s installation requirements. If conductor sizes, wiring methods, equipment, or conduit routing change during construction, the responsible design or permitting party should determine whether the change affects the approved design.
5. Rapid Shutdown Problems
Rapid shutdown is a solar-specific safety feature that may be required for applicable PV installations. Because it is meant to reduce electrical hazards during emergencies, inspectors may verify that the system is installed according to the applicable requirements and the approved design. Potential problems include incorrect rapid shutdown equipment, equipment that differs from the approved plans, incorrect system configuration, wiring or communication issues, missing required markings, and equipment installed contrary to manufacturer instructions.
Why rapid shutdown creates corrections. Requirements depend on the code edition, system configuration, equipment, and jurisdiction, so an installation should not be judged against a generic checklist from another project.
How to avoid it. Verify the rapid shutdown equipment and configuration against the approved plans, equipment documentation, manufacturer instructions, and AHJ requirements. If the equipment changes during installation, confirm whether the change affects the approved design before requesting inspection. Exemptions also differ by code edition, and our article on 2023 NEC rapid shutdown exemptions explains which structures qualify.
6. Electrical Panel or Disconnect Issues
Service equipment, panels, breakers, and disconnecting means can also create corrections. Depending on the project, an inspector may review disconnect location and accessibility, equipment identification, breaker configuration, panel capacity and busbar considerations, interconnection configuration, circuit protection, panel schedules, and connections to existing electrical equipment.
Why panel problems happen. Solar systems interact with existing service equipment, so the existing panel configuration is an important part of the design. Problems occur when the installed configuration differs from the approved plans, equipment was changed during installation, the panel was modified without updating documentation, or a disconnect was installed differently than shown.
How to avoid it. Install service equipment according to the approved electrical design. If the existing panel or service configuration changes during installation, do not assume the original plans remain valid. If the project includes battery storage, the inspector may also check battery location, clearances, and disconnects against the plans, and fire-safety standards such as NFPA 855 can apply.
7. Structural and Mounting Problems
Inspection corrections are not limited to electrical components. For rooftop and ground-mounted systems, inspectors may also review structural and mounting components within the scope of the inspection. Potential issues include a racking configuration that differs from the approved plans, mounting hardware that differs from the design, changed attachment locations, roof penetrations installed differently than designed, and structural members or foundations that differ from the structural documentation.
Rooftop solar
A roof-mounted installation involves roof attachments, racking, rails, mounting hardware, structural members, roof penetrations, and flashing or weather protection. The installed configuration should correspond with the approved structural design and the applicable installation requirements.
Ground-mounted solar
Ground mounts add posts, footings, anchors, framing, racking, and foundation details. If the field installation differs from the engineered design, the change may need to be reviewed before the project can be approved.
How to avoid it. Do not treat the structural plan as a document used only for permitting. The installer should use the approved structural documents as a reference during construction so the finished installation corresponds with the design.
8. Fire Access and Roof Layout Issues
The physical location of an array can affect roof access and other fire-safety considerations. An installation may receive corrections when the completed layout differs from the approved design in a way that affects required access or clearances. Potential issues include a changed array layout, obstructed pathways, modules installed in different locations, moved equipment, roof obstructions that were not accounted for, and an installed layout that does not match the approved plans.
Why layout changes matter. Roof layouts are not designed only around how many panels fit. The approved design may account for roof geometry, roof edges, access pathways, obstructions, equipment locations, fire access requirements, and structural constraints. Moving modules in the field can therefore have consequences beyond the appearance of the array.
How to avoid it. If the installer needs to change the approved layout, evaluate the change before the inspection. Fire access and setback requirements vary by jurisdiction and adopted code, so a layout accepted in one city should not be assumed acceptable in another. Our guide to why roof setbacks matter for solar fire safety explains the reasoning behind these pathways.
9. Equipment Is Not Accessible for Inspection
Sometimes the equipment itself is not the problem. The problem is that the inspector cannot properly access or verify it. Common examples include electrical panels blocked by stored items, disconnects that cannot be reached, inaccessible inverters or battery equipment, junction boxes that cannot be opened, roof access that has not been provided, and required inspection areas that are obstructed.
Why access matters. An inspector must be able to verify the installation. If equipment is hidden, blocked, or locked away, the inspector may be unable to complete the inspection even when the equipment was installed correctly.
How to avoid it. Before requesting the inspection, make sure the areas to be inspected are safely accessible. This is one of the easiest categories to prevent because it usually does not require redesigning anything. Our guide on how to prepare for solar inspections walks through pre-inspection preparation.
10. Unapproved Changes Made During Installation
Field changes deserve special attention because they connect several of the problems above. An installer may discover an unexpected condition and make a practical change, such as moving an inverter, relocating a battery, substituting equipment, changing the array layout or racking, moving a structural attachment, or altering the electrical configuration. The change itself may or may not be acceptable. The problem is failing to determine whether it affects the approved design.
Why field changes create inspection problems. An inspector arrives expecting the system shown in the approved plans. If the installation is materially different, the inspector may need additional documentation or AHJ approval before the project can move forward. What would have been a simple inspection can become a correction, a plan revision, or an additional review.
What to do when something changes
- Identify exactly what changed.
- Compare the change with the approved plans.
- Determine whether it affects electrical, structural, fire access, or equipment requirements.
- Confirm whether revised plans are required.
- Obtain the appropriate AHJ approval when necessary.
- Make sure the final documentation reflects the approved installation.
The earlier a change is addressed, the easier it usually is to resolve.
What Happens If a Solar Inspection Fails?
A correction does not necessarily mean the entire project must be redone. The inspector identifies the items that must be corrected or clarified, the responsible party addresses them, and the AHJ may require a reinspection. Depending on the correction, the response may involve replacing or adding labels, correcting wiring, addressing grounding or bonding, correcting equipment or structural installation, providing additional documentation, revising plans, or obtaining additional AHJ approval.
The key is to separate a field correction from a design or documentation issue. A missing label can usually be resolved in the field. A change to the inverter, battery, structural system, or electrical configuration may need additional review. For plan revisions, see our guide on how to respond to solar permit corrections. If the correction points back to the design itself, our overview of common solar permit design challenges explains where those problems start.
Because every project answers to its own requirements, it is more useful to focus on the specific correction items than to think of an inspection as a simple pass or fail. An inspector may cite a single missing label, an inaccessible disconnect, a grounding issue, a wiring problem, a discrepancy between equipment and plans, or a structural detail. The project moves forward once the identified items are addressed and any required reinspection or approval is complete.
Passing Inspection Is Not the Same as Permission to Operate
For grid-connected systems, AHJ inspection approval and utility Permission to Operate (PTO) are separate stages. The U.S. Department of Energy describes permitting and inspection as processes that must happen before a solar array is allowed to produce electricity on the grid, with the utility connecting the system afterward. For inverter-based systems, the technical baseline for utility interconnection is IEEE 1547. Do not turn on a grid-connected system until the utility authorizes operation.
How to Reduce the Risk of Solar Inspection Corrections
No approach guarantees first-time approval, because every project answers to its own requirements and AHJ. Several practices do reduce avoidable problems:
- Build according to the approved plans. The installation should correspond with the permitted design.
- Address field changes early. Do not wait for the inspector to find a discrepancy.
- Verify electrical installation details. Wiring, conduit, grounding, bonding, disconnects, and equipment should match the approved design and applicable requirements.
- Confirm required labels. Make sure labels and placards fit the actual final system.
- Verify structural installation. Racking, attachments, and foundations should match the engineered documents where applicable.
- Make inspection areas accessible. The inspector needs safe access to the equipment.
- Review the final installation before requesting inspection. A pre-inspection review catches discrepancies before they become AHJ corrections.
For a step-by-step walkthrough, use our Solar Panel Inspection Checklist: What to Check & When to Inspect. Streamlined programs such as the SolSmart National Simplified Solar Permitting Guide aim to make permitting and inspection more consistent for local governments, but requirements still differ by jurisdiction.
Conclusion
Most solar inspection corrections are easier to prevent when potential problems are found before the inspector arrives. The areas to watch are the installation matching the approved plans, proper labeling, grounding and bonding, wiring and conduit, rapid shutdown, electrical panels and disconnects, structural and mounting components, fire access and array layout, equipment accessibility, and field changes that were never addressed.
The goal is not simply to make the system look complete. The completed installation should correspond with the approved design and satisfy the requirements that apply to the project. If your installation is already finished, the next step is understanding what happens during the inspection, how corrections are handled, and how the project moves from AHJ approval to utility interconnection. Our full guide, Solar Inspection After Installation: What Happens Next?, covers that process.
Many inspection corrections trace back to the plan set rather than the field work. If you want plans built to your AHJ’s expectations, explore our solar permit design services, including residential solar design and commercial solar design, or submit your project to get started.
Frequently Asked Questions
Skip the Permit Headaches
We design plan sets that pass inspection the first time. Code-compliant, PE-stamped, accepted by AHJs nationwide.
Frequently Asked Questions
Solar inspections commonly receive corrections because of discrepancies between the installed system and the approved plans, electrical installation problems, grounding and bonding issues, missing labels, rapid shutdown concerns, structural or mounting issues, fire access problems, inaccessible equipment, or undocumented field changes. The exact requirements depend on the AHJ, adopted code edition, system configuration, and project-specific requirements.
No single reason applies to every jurisdiction or project. However, discrepancies between the approved plans and the completed installation are an important source of inspection corrections. Electrical, labeling, grounding and bonding, rapid shutdown, structural, access, and other project-specific issues can also result in corrections.
Yes. If the installed equipment differs from the approved plans, the AHJ may require the change to be reviewed, documented, or approved before the project can receive final approval. This can include changes to modules, inverters, batteries, disconnects, racking, or other significant system components.
Yes. Required labels and placards are part of the inspection for many solar installations. Missing, incorrect, illegible, or improperly located labels can result in correction items. The specific requirements depend on the applicable code edition, system configuration, and jurisdiction.
Yes. Grounding and bonding are important parts of the electrical installation and may be reviewed during inspection. Incorrect, incomplete, or improperly installed grounding and bonding components can result in corrections.
The inspector identifies the correction items. The responsible party completes the corrections, and the AHJ may require a reinspection before final approval. If a correction involves a design or equipment change, revised plans or additional AHJ approval may also be required.
Not necessarily. AHJ inspection approval and utility Permission to Operate are separate stages for grid-connected systems. After the required inspection and approval, the project may still need to complete the utility interconnection requirements before the system can receive PTO.
No. Requirements vary based on the AHJ, adopted code edition, utility, project type, equipment, system configuration, and local rules. A checklist or approach that worked on one project should not automatically be assumed to apply to another jurisdiction.

SPS Editorial Team
Solar Permit Solutions
Solar Permit Solutions provides professional solar permit design services for residential, commercial, and off-grid installations across all 50 states. Our team ensures permit-ready plan sets delivered fast.
Related Articles
Solar Grounding And Bonding: How To Pass Inspection Every Time
Learn how to pass solar grounding and bonding inspections every time. Avoid comm...
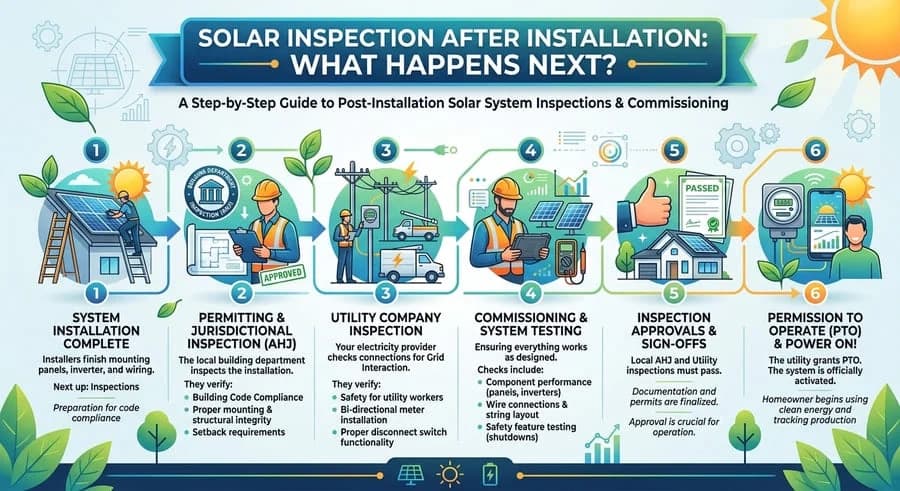
Solar Inspection After Installation: What Happens Next?
Learn how to pass your solar inspection by following essential tips for obtainin...
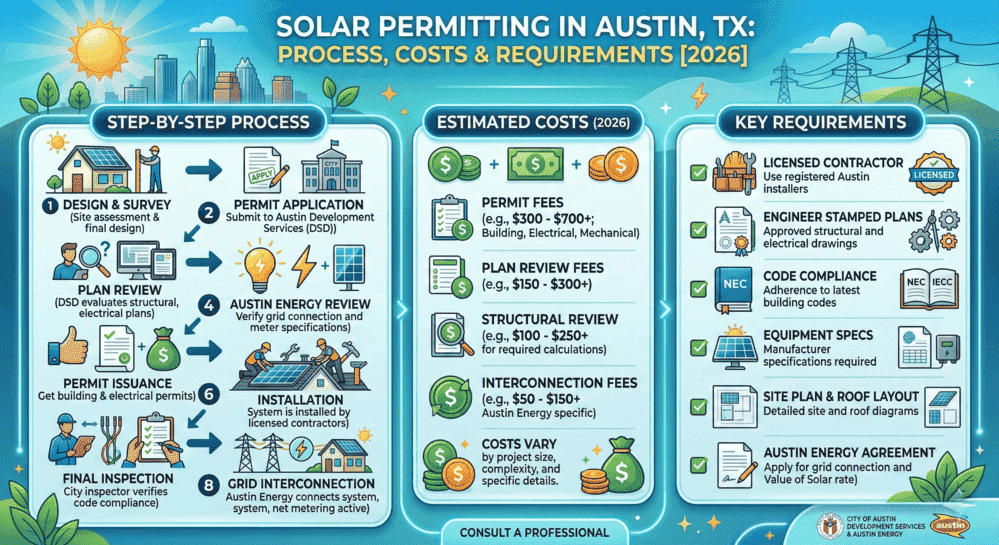
Solar Permit Services in Austin, TX
Solar permits in Austin center on an Auxiliary Power Electrical Permit for any s...