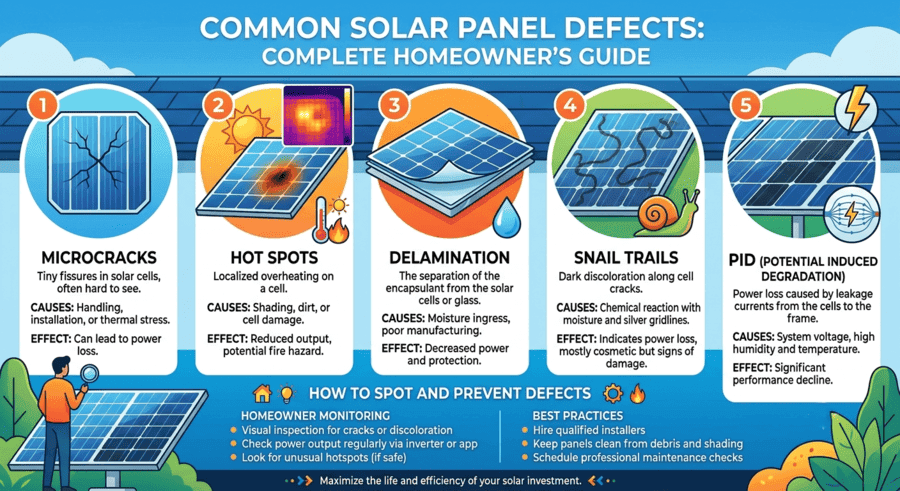
Updated 2026 | By Solar Permit Solutions Editorial Team
Solar panels typically last 25 to 30 years, and catastrophic failure is rare. But small defects, a hairline crack, a discolored cell, or a loose junction box can quietly cut into energy production long before a homeowner notices a problem on the monthly bill. Catching a defect early is usually the difference between a simple repair and a full panel replacement, and it can also be the difference between a covered warranty claim and an out-of-pocket expense.
The most common solar panel defects are microcracks, delamination, hot spots, snail trails, potential induced degradation (PID), broken or cracked glass, moisture intrusion, junction box failure, backsheet cracking, corrosion, and bypass diode failure. Many of these problems can be repaired if caught early, while others require full panel replacement. This guide walks through all eleven, how professionals diagnose them, what repairs typically cost, and how to tell the difference between ordinary aging and an actual defect.
What Are Solar Panel Defects?
A solar panel defect is any flaw in a photovoltaic module that reduces its safety, performance, or expected lifespan below what the manufacturer specified. Defects generally trace back to one of five sources: a manufacturing flaw baked in at the factory, damage that occurred during shipping, an installation mistake, environmental stress after the panel was mounted, or an electrical component failure somewhere in the circuit. Some of these problems are purely cosmetic and never affect output. Others quietly reduce production for years. A smaller number create real safety hazards, including fire risk, and need immediate attention.
Choosing well-built equipment in the first place matters here. Our roundup of top-performing solar panels breaks down which manufacturers score highest on warranty coverage and independent reliability testing, which correlates closely with how often a given panel model shows up in defect reports.
The table below sorts the eleven defects covered in this guide by whether they are purely cosmetic, whether they cause measurable performance loss, whether they carry a safety risk, and whether a repair is typically possible.
| Defect | Cosmetic Only | Performance Loss | Safety Risk | Repairable |
| Microcracks | Sometimes | Yes | Low | Rarely |
| Delamination | No | Yes | Low | Rarely |
| Hot spots | No | Yes | Yes | Sometimes |
| Snail trails | Usually | Sometimes | No | No |
| PID | No | Yes | No | Sometimes |
| Broken or cracked glass | No | Yes | Yes | Rarely |
| Moisture intrusion | No | Yes | Yes | Rarely |
| Junction box failure | No | Yes | Yes | Yes |
| Backsheet cracking | No | Yes | Yes | Rarely |
| Corrosion | Sometimes | Yes | Low | Sometimes |
| Bypass diode failure | No | Yes | Yes | Yes |
11 Common Solar Panel Defects
Each defect below covers what it is, what usually causes it, the warning signs to look for, how professionals detect it, and whether repair or replacement is the realistic outcome.
1. Microcracks
A microcrack is a fracture in the silicon cell itself, invisible to the naked eye and typically caused by mechanical stress during manufacturing, shipping, or installation, most often from a technician stepping on a panel or from thermal cycling once the array is in service. Symptoms include a gradual, hard-to-pin-down drop in output, sometimes with no visible sign at all. Microcracks are detected with electroluminescence (EL) imaging, which lights up the cell grid and reveals dark, spiderweb fracture lines. A single microcrack rarely causes a noticeable production loss on its own, but cracks tend to propagate over time and can eventually isolate part of a cell, causing losses in the 2 to 5 percent range per affected panel. Repair is not realistic since the fracture is inside the cell laminate. If EL imaging confirms extensive cracking across a string, panel replacement is the standard path.
2. Delamination
Delamination is the separation of the layers inside a panel, most often the glass pulling away from the EVA encapsulant that bonds the cells in place. It is usually caused by UV degradation of the encapsulant, poor lamination during manufacturing, or long-term moisture exposure. Visible signs include cloudy or milky patches, bubbling, or a hazy discoloration spreading from the panel edges inward. Once moisture works its way into a delaminated area, it accelerates corrosion of the internal circuitry, so the defect tends to get worse quickly rather than staying stable. Delamination is not field repairable. If the panel is still within its product warranty period, most manufacturers will replace it at no cost, which is one of the more common warranty claims installers file.
3. Hot Spots
A hot spot forms when one cell in a string produces less current than the rest, usually because of shading, debris, a manufacturing defect, or a failed bypass diode, forcing that cell to absorb power instead of generating it. The cell overheats, sometimes to well over 150 degrees Fahrenheit, which degrades the surrounding materials and, in rare cases, creates a fire risk of the kind addressed under the fire and electrical safety provisions of the National Electrical Code. Hot spots are diagnosed with a thermal imaging camera, either handheld or drone mounted, which shows the overheated cell as a bright spot against the cooler array. If caught early and the cause is shading or debris, clearing the obstruction resolves the issue. If the cause is a failed bypass diode or a cell level defect, the diode can sometimes be replaced, but if the cell itself has degraded, panel replacement is usually the safer call.
4. Snail Trails
Snail trails are the thin, silvery, winding discoloration lines that appear along microcracks on the front surface of a panel, named for their visual resemblance to the trail a snail leaves behind. They result from a chemical reaction between moisture, the silver paste in the cell’s conductive grid lines, and the encapsulant. Snail trails are almost always cosmetic on their own and do not directly cause power loss, but their presence is a strong indicator that microcracks exist underneath, so a panel with visible snail trails is worth an EL imaging inspection to rule out the underlying crack getting worse. There is no repair for snail trails themselves, and manufacturers generally treat them as a workmanship issue only if paired with confirmed performance loss.
5. Potential Induced Degradation (PID)
PID is a voltage leakage effect that occurs when a high negative voltage potential builds up between a cell and the grounded panel frame, allowing ions to migrate through the encapsulant and gradually degrade the cell’s performance. It shows up most often in humid climates, in large systems with long strings and high system voltages, and in older panel technology that lacks PID-resistant cell coatings. Symptoms include a system-wide production decline that does not match any single visible defect. PID is confirmed with IV curve testing across a string, which shows a characteristic drop in fill factor. In many cases, PID is at least partially reversible with a PID recovery box or reverse bias treatment applied overnight, though severely affected cells may not fully recover. Newer panels built to current IEC PID resistance testing standards are far less susceptible than modules manufactured before roughly 2015.
6. Broken or Cracked Glass
Cracked or shattered front glass is usually caused by hail impact, a falling tree branch, foot traffic during installation or roof work, or improper handling before the panel was ever mounted. A cracked panel is a straightforward visual diagnosis, though a full assessment should also check whether moisture has already penetrated the crack. A small surface chip that has not compromised the seal may continue operating for a period, but any crack that breaks the glass-to-cell barrier should be treated as a safety issue, since moisture intrusion and electrical exposure follow quickly. Glass replacement in the field is not standard practice for laminated modules, so a cracked panel almost always means full panel replacement, and homeowners insurance often covers hail-related cracking under a standard policy.
7. Moisture Intrusion
Moisture intrusion happens when the panel’s edge seal, backsheet, or junction box gasket fails, letting water vapor reach the internal circuitry. Common causes include a degraded edge seal, a cracked backsheet, or a poorly sealed junction box connection made during installation. Warning signs include visible fogging or condensation under the glass, a milky discoloration similar to early delamination, and corrosion visible at the cell interconnects if the panel is opened for inspection. Left unaddressed, moisture intrusion leads to electrical shorts and accelerated corrosion of the ribbon wires connecting each cell. Moisture intrusion is rarely repairable in the field since resealing a compromised laminate does not restore the barrier, so replacement is the typical outcome, and it is worth requesting a full system checkup, similar to the walkthrough in our guide to why a solar panel stops working, whenever moisture is suspected.
8. Junction Box Failure
The junction box is the small enclosure on the back of the panel where the internal cell circuit connects to the external wiring and bypass diodes. Junction box failures stem from a cracked housing, a corroded connector, a poor factory solder joint, or heat damage from a loose connection arcing over time. Symptoms include a complete loss of output from one panel, visible discoloration or melting around the box, or a string that will not test correctly. Because a failing junction box can arc and create a fire hazard, it should be treated as an electrical safety issue rather than a performance nuisance, and any panel showing heat discoloration around the box should be de-energized before further work, following the same disconnect procedures covered under OSHA’s electrical safety requirements for listed equipment. Unlike most defects on this list, junction box failure is genuinely repairable. A licensed technician can replace the junction box assembly on many panel models without replacing the whole module, provided the manufacturer still supplies compatible parts. Reviewing your electrical panel’s overall condition is also worthwhile any time a junction box issue turns up, since both problems often trace back to the same aging wiring.
9. Backsheet Cracking
The backsheet is the polymer layer on the rear of the panel that provides electrical insulation and weather protection. It cracks from prolonged UV exposure, thermal cycling between hot days and cool nights, and lower-quality backsheet materials used in some older or budget panel lines. Visible cracking, chalking, or brittleness on the back surface is the main warning sign, usually most severe near the frame edges. A cracked backsheet compromises the panel’s insulation barrier, which raises both a moisture intrusion risk and, in more severe cases, a ground fault risk. Backsheet material cannot be practically re-laminated in the field, so a panel with confirmed backsheet cracking should be flagged for replacement, and if it is still within the 10 to 25-year product warranty window that most manufacturers offer, it is worth filing a claim before paying out of pocket.
10. Corrosion
Corrosion attacks the metal components of a panel, most often the aluminum frame, the ribbon wire interconnects between cells, and the junction box connectors. It is driven by moisture intrusion combined with salt air in coastal installations, dissimilar metal contact at connection points, or manufacturing defects in the protective coating on the frame. Early corrosion shows up as white or greenish oxidation on the frame or connectors. Once corrosion reaches the internal ribbon interconnects, it increases electrical resistance and gradually reduces output. Frame corrosion alone is often cosmetic and does not require action. Corrosion at electrical connections, however, is a repair candidate if caught early since connectors and cables can be replaced without touching the sealed laminate, but corrosion inside the sealed cell circuit itself means the panel needs to be replaced.
11. Bypass Diode Failure
Bypass diodes route current around a shaded or underperforming section of cells so the rest of the panel keeps producing normally. When a diode fails, usually from a manufacturing defect, a lightning-induced power surge, or years of heat stress inside the junction box, the section it protects can no longer be bypassed. This produces a hot spot in that section and a measurable output drop across the whole panel, since the current path is now restricted rather than routed around the problem. Diode failure is confirmed with thermal imaging showing a hot section combined with an IV curve test showing a stepped output curve. Because the diode sits in the accessible junction box rather than inside the sealed laminate, this is one of the more straightforward repairs on this list; a qualified technician can swap the failed diode without replacing the panel, provided the junction box itself is not also damaged.
Solar Permit Solutions
Homeowner Going Solar?
Get the permit-ready plan set your city requires — delivered fast so your solar project stays on schedule.
Solar Panel Defects vs. Normal Degradation
One of the most common questions homeowners ask is whether a change in production is a defect or simply the panel aging the way it is supposed to. Very few guides draw this line clearly, so the table below separates expected, gradual aging from the warning signs of an actual defect.
| Normal Aging | Actual Defect |
| Roughly 0.3 to 0.6 percent efficiency loss per year, consistent with published field degradation research | A sudden production drop of 10 percent or more between comparable months |
| Slight, even discoloration across the whole panel surface over many years | Localized hot spots, blistering, or bubbling in one area |
| A small, steady efficiency decline that tracks the manufacturer’s degradation curve | Delamination, cloudy patches, or visible internal separation |
| Output that stays within the manufacturer’s guaranteed performance warranty curve | Physical damage such as cracked glass, corrosion, or a compromised backsheet |
According to field data from the Photovoltaic Lifetime Project, the U.S. The Department of Energy’s long-running module monitoring program shows well-built crystalline silicon panels typically lose well under one percent of output per year after their first year in service. A production drop that significantly exceeds that pace, especially one that happens quickly rather than gradually, is the clearest signal that something has actually failed rather than simply aged.

What Causes Solar Panel Defects?
Defects generally fall into six categories, and knowing which one applies helps determine whether a warranty claim, a repair, or a preventive fix is the right next step.
- Manufacturing defects: inconsistent lamination, contaminated silicon, poor solder joints, or a component that failed a quality check but shipped anyway. Reputable manufacturers publish independent reliability data and certify modules to construction and testing standards, such as those covered under UL’s PV module safety certification program and the IEC 61215 design qualification standard, which meaningfully lowers the odds of a factory defect.
- Poor installation practices: foot traffic on panels, over-torqued or under-torqued mounting hardware, and pinched wiring are frequent culprits behind cracked glass and junction box damage. Our breakdown of common DIY solar installation mistakes covers the installation errors that most often lead to early defects.
- Transportation and shipping damage: rough handling before the panel ever reaches the roof is a leading cause of microcracks that are invisible until an EL scan is performed months or years later.
- Weather: Hail, heavy snow load, hurricane-force wind, and rapid freeze-thaw cycling all stress the glass, frame, and internal laminate over time.
- Wildlife: rodents chewing through wiring insulation and birds nesting under panels are a surprisingly common source of junction box and connector damage, particularly on ground-mounted arrays.
- Improper maintenance: pressure washing panels, walking on them during cleaning, or ignoring an inverter fault code for months can turn a minor issue into a costly one. Our solar panel maintenance guide covers the maintenance habits that actually reduce defect risk versus the ones that cause it.
How Professionals Detect Solar Panel Defects
Solar professionals rely on a layered set of inspection methods, since no single technique catches every defect on this list. A typical diagnostic sequence looks like this.
- Visual inspection. A trained technician walks the array looking for cracked glass, discoloration, snail trails, corrosion, and obvious physical damage.
- Monitoring software review. Production data from the system’s monitoring platform is compared panel by panel or string by string to flag underperformers before a truck ever rolls.
- Thermal imaging. A handheld or drone-mounted infrared camera identifies hot spots caused by shading, failed bypass diodes, or cell-level defects, work that is increasingly performed by NABCEP-certified PV system inspectors who are trained specifically in code-compliant diagnostic procedures.
- Electroluminescence (EL) imaging. Cells are electrically excited in a darkened environment and photographed with a modified camera, revealing microcracks and cell-level defects invisible to the eye.
- IV curve testing. A curve tracer applies a controlled load across a string and graphs current versus voltage, revealing PID, bypass diode failure, and shading losses through characteristic deviations from the expected curve.
- Drone inspections. Large residential and commercial arrays are increasingly scanned by drone-mounted thermal and visual cameras, which cover far more panels per hour than a ground-based walkthrough.
Independent national laboratory research, including work coordinated through Sandia National Laboratories’ photovoltaic reliability program and validated at the Department of Energy’s Regional Test Centers, has helped standardize the thermal imaging and EL testing thresholds installers use today to decide whether a flagged panel needs repair or replacement. Homeowners scheduling their own diagnostic visit can use our solar panel testing guide to understand what a technician should be checking and how often.
Can Solar Panel Repairs Fix These Defects?
Solar panel repairs are more limited than most homeowners expect. Anything sealed inside the laminate, the cells, the encapsulant, and the internal wiring is essentially unrepairable in the field. Anything accessible from outside the laminate, the junction box, external connectors, and the frame can often be fixed without replacing the whole module.
| Defect | Repairable? | Typical Solution |
| Microcracks | Rarely | Replace the panel and monitor minor cases |
| Delamination | No | Replace panel, often under warranty |
| Hot spot | Sometimes | Clear shading or replace bypass diode |
| Broken glass | Rarely | Replace module |
| Junction box failure | Yes | Replace junction box assembly |
| Bypass diode failure | Yes | Replace the failed diode |
| Moisture intrusion | Rarely | Replace panel |
| Corrosion (connectors) | Yes | Replace connectors or cabling |
This is the core distinction to remember when a technician says a panel needs solar panel repairs rather than replacement: the fix almost always involves a component bolted or wired to the outside of the module, never the sealed cell assembly itself.
Solar Panel Repair Costs
| Repair | Typical Cost |
| Diagnostic inspection (visual and monitoring review) | $100 to $250 |
| Thermal imaging inspection | $150 to $400 |
| Electroluminescence (EL) testing | $200 to $500 per string |
| Junction box replacement | $150 to $350 per panel |
| Bypass diode replacement | $100 to $250 per panel |
| Wiring or connector repair | $100 to $300 |
| Full panel replacement | $150 to $400 per panel, plus labor |
| Inverter diagnostic and fault check | $150 to $500 |
Actual pricing depends heavily on labor rates in your area, roof accessibility, and whether the system is still covered under a manufacturer or installer warranty. Homeowners comparing quotes for a repair or a partial system rebuild should apply the same scrutiny recommended in our solar quote comparison guide, since repair pricing varies just as widely as new installation pricing.
Should You Repair or Replace a Solar Panel?
A simple decision path can shortcut most of the guesswork:
- If production loss is under 5 percent and there is no visible physical damage, monitor the panel for another billing cycle before taking action.
- If visible cracks, cloudy patches, or discoloration are present, schedule an EL or thermal imaging inspection to confirm the defect and its severity.
- If the defect is confirmed but limited to the junction box, a bypass diode, or an external connector, repair is usually the faster and cheaper path.
- If moisture has reached the internal circuitry, or if glass, backsheet, or encapsulant damage is confirmed, replacement is almost always the right call.
- If the system is still within its performance or product warranty window, file the claim before paying for anything out of pocket.
Because a new panel purchased today may outperform an aging model from years ago, it is also worth running the numbers on whether a repair actually pencils out financially. Our guide to solar panel payback periods walks through how to weigh a repair cost against the remaining useful life and expected output of an aging panel before committing to either path.
Does Your Solar Panel Warranty Cover Defects?
Most reputable manufacturers offer two separate types of coverage, and understanding the difference determines whether a defect is a covered claim or an out-of-pocket repair.
- Product warranty: covers manufacturing defects and workmanship issues, typically for 10 to 25 years depending on the manufacturer.
- Performance warranty: guarantees a minimum power output, commonly 80 to 92 percent of original rated output after 25 years, and covers cases where degradation outpaces the published curve.
- Workmanship warranty: provided by the installer rather than the manufacturer, this typically covers installation-related issues such as roof penetrations, mounting hardware, and wiring for 5 to 10 years.
What usually voids a warranty: unauthorized modifications, damage from unlicensed installation or repair work, pressure washing or walking on panels against manufacturer instructions, and physical damage from events like falling branches, which typically falls to homeowners insurance rather than the panel warranty.
To document a claim properly, keep dated photos of the defect, a copy of your monitoring data showing the production drop, and your original installation paperwork. The kinds of questions worth confirming before you ever need to file a claim are covered in our guide to critical questions to ask before signing a solar contract, and industry-wide consumer protection standards for residential solar, including standardized warranty disclosures, are tracked by the Solar Energy Industries Association. If your panels are financed under a lease or PPA rather than owned outright, warranty responsibility usually sits with the leasing company rather than the homeowner, which is worth understanding well before the contract term ends, as covered in our guide to what happens at the end of a solar lease or PPA.
Inverter warranties follow a different, generally shorter schedule than panel warranties, and a failing inverter is sometimes mistaken for a panel defect. Our guide to solar inverter warranties and our overview of solar inverter lifespan both help separate an inverter issue from an actual module defect before a claim gets filed against the wrong component. Understanding the difference between string inverters and microinverters also matters here, since a single failed microinverter looks identical to a panel-level defect on a monitoring dashboard until it is tested directly.
How to Prevent Solar Panel Defects
Most defects on this list are preventable, or at least catchable early, with a small set of consistent habits.
- Use a professional, code-compliant installer and confirm the project passed all required inspections, not just a final walkthrough. Our guide to the required solar installation inspections explains what each inspection stage is actually checking for.
- Schedule annual visual and thermal inspections rather than waiting for a production drop to trigger a service call.
- Trim overhanging trees so falling branches and the shading that leads to hot spots are both minimized.
- Monitor production monthly and compare it to the same month in prior years rather than relying on gut feel.
- Avoid walking on panels, and never let a cleaning crew do so either.
- Clean panels safely with soft water and a soft brush, never a pressure washer, which can force water past seals and cause the moisture intrusion covered earlier in this guide.
- Check the array after major storms for cracked glass, loose mounting hardware, or debris that could create a hot spot.
If a defect is ever traced back to how the array was originally installed rather than the equipment itself, following basic DIY solar safety guidelines on future work or simply hiring a licensed professional for anything involving the junction box or panel-level wiring prevents the same problem from recurring.
When a panel does eventually reach the end of its useful life, whether through age or an unrepairable defect, it should be recycled rather than sent to a landfill. The U.S. Environmental Protection Agency’s guidance on end-of-life solar panels covers how retired modules are regulated and where responsible recycling options exist.
Frequently Asked Questions
Does homeowner’s insurance cover damaged solar panels?
Often, yes, for damage from covered perils such as hail, wind, or falling branches, since panels are typically treated as a permanent structure attached to the home. Manufacturing defects and gradual wear are not covered by homeowners insurance and fall instead under the panel’s product and performance warranty.
Homeowner Going Solar?
Get the permit-ready plan set your city requires — delivered fast so your solar project stays on schedule.
Frequently Asked Questions
The most common solar panel defects are microcracks, delamination, hot spots, snail trails, potential induced degradation, broken or cracked glass, moisture intrusion, junction box failure, backsheet cracking, corrosion, and bypass diode failure. Junction box and bypass diode issues are the most repairable; the rest usually require replacement.
Some can. Defects in accessible components, the junction box, bypass diodes, external wiring, and connectors, are genuinely repairable. Defects sealed inside the laminate, including microcracks, delamination, and moisture intrusion, generally require full panel replacement rather than a field repair.
A single small microcrack rarely creates an immediate safety hazard, but cracks tend to grow over time and can eventually isolate part of a cell, causing localized overheating. Extensive or spreading microcracking should be evaluated with electroluminescence imaging rather than left unaddressed.
Watch for a production drop of 10 percent or more compared to the same month in a prior year, visible cracks, cloudy or bubbling patches, discoloration, or corrosion. A monitoring dashboard showing one panel or string consistently underperforming is often the first sign, followed by a professional inspection to confirm the cause.
Manufacturing defects; poor installation practices; shipping damage; severe weather, including hail and high wind; wildlife interference; and improper maintenance, such as pressure washing, are the leading causes of premature solar panel failure.
Diagnostic inspections typically run $100 to $500 depending on the method used. Component-level repairs such as junction box or bypass diode replacement generally cost $100 to $350 per panel. Full panel replacement runs $150 to $400 per panel before labor, though warranty coverage often eliminates the cost entirely.
Often, yes, for damage from covered perils such as hail, wind, or falling branches, since panels are typically treated as a permanent structure attached to the home. Manufacturing defects and gradual wear are not covered by homeowners insurance and fall instead under the panel's product and performance warranty.
Yes, though modern panels are tested against significant hail impact before certification. Cracked glass is one of the more common hail-related outcomes, and any panel with visible impact damage should be inspected promptly since a compromised seal allows moisture intrusion.
Repair when the defect is confirmed to be limited to the junction box, a bypass diode, or external wiring. Replace when the defect involves the sealed cell laminate, including microcracks, delamination, moisture intrusion, or backsheet cracking, since none of those can be reliably fixed in the field.
Most solar panels are designed to last 25 to 30 years, with manufacturers guaranteeing at least 80 to 92 percent of original output at the 25-year mark. Actual lifespan depends heavily on installation quality, local climate, and how quickly any defects that do appear are caught and addressed.

SPS Editorial Team
Solar Permit Solutions
Solar Permit Solutions provides professional solar permit design services for residential, commercial, and off-grid installations across all 50 states. Our team ensures permit-ready plan sets delivered fast.
Related Articles
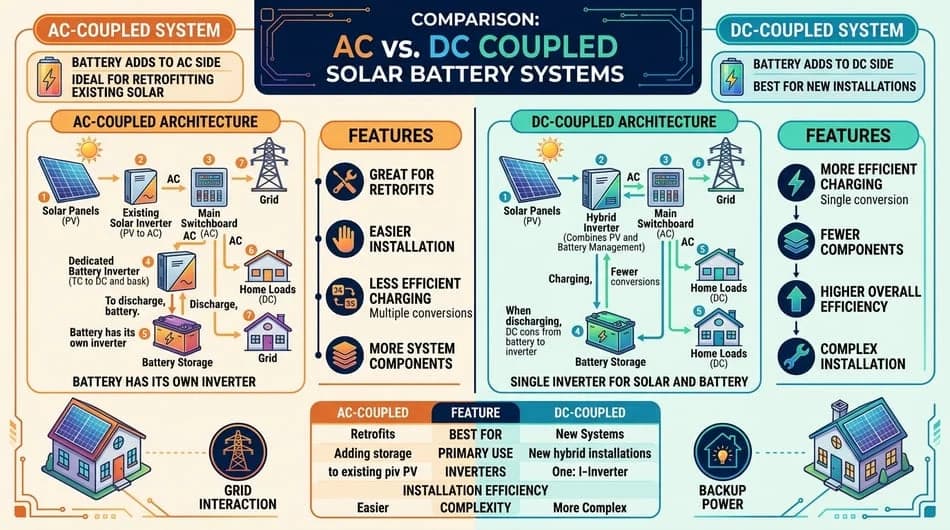
AC vs DC Coupled Solar Batteries: Which Should You Choose?
AC vs DC coupled solar batteries compared: efficiency, costs ($8K-$18K), and ins...
How Many Solar Panels Do I Need to Run Off the Grid?
Most off-grid homes need about 8 to 16 solar panels rated at 400 watts, dependin...
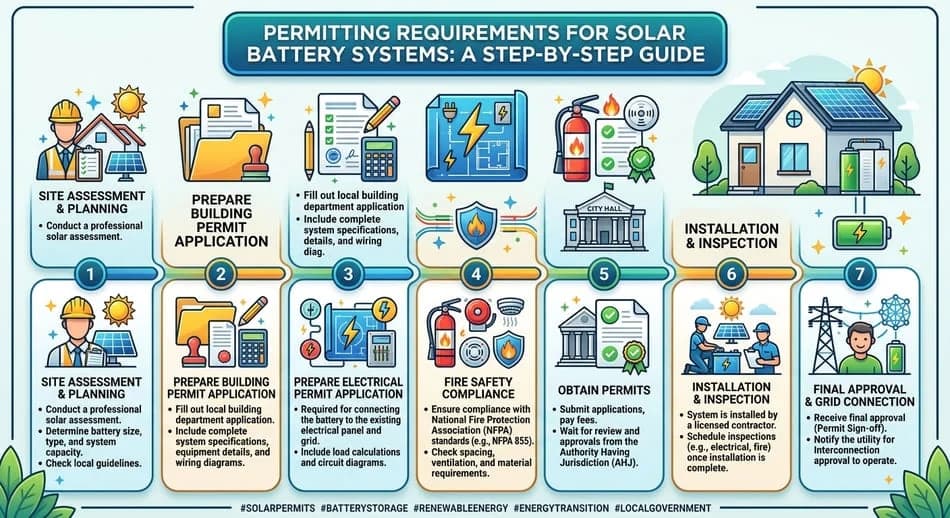
Solar Battery Permit Requirements: What You Need to Know
A solar battery usually needs local approval and a utility review before it can ...